Sock Puppet Fundraiser...

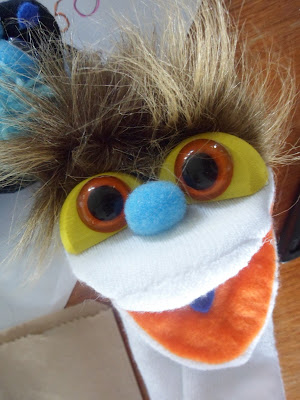
My class made sock puppets to sell at the end of year to make money for the SPCA.  We managed to buy the socks when they were on sale.  

I helped the children to glue in the mouth plates and left them too it.  They chose the eyes and the type of hair for each puppet.  

When all the sock puppets were finished they were placed into brown paper bags.  The children really loved giving each puppet a name.  

On the front of each bag they wrote the name of the puppet, the puppet's age and the name of the puppet maker.  

All of the sock puppets sold in about 10 minutes!


Colour Poems

A few years back....that's how far I'm behind with my blog!  I have so many things to write about and share.  My aim this year is to catch up!

Anyway, getting children to create colour poems fits so well with feelings and the five senses.

Back then I thought carefully about how I wanted my eager learners to go about doing this.  None of them had written a colour poem before and had just been introduced to using the five senses in their personal recount writing.

I knew I had to get them out there in the school environment and explore their surroundings.

Day 1:
The children picked shapes out of a box then formed small groups.  They used an iPad to go and take photos or video footage of either anything green or anything blue.

Once back in the class children flicked threw their photos and started to explore the five senses.  I thought I could have kept them on the iPads to do this, but  I actually thought it would be quicker and a more powerful discussion face to face.  They used huge pieces of paper to write similes sentences about the colour green or blue using the 5 senses.  These sheets of paper were then stapled to the classroom walls.

Day 2 - 5:
I wanted to take this further.  We talked about other colours and I decided to use our class Pinterest as a tool.  I wanted to extend the children and to get them to really think about what objects, living or non-living were that colour.

Children worked in groups to find images for each colour.  They then picked a colour they really wanted to focus on.  Some children worked in groups and some wanted to work individually.

I created a sheet with the 5 senses that they could use to put down some key ideas.

Once each pair or individual had their sentence they wrote this out and stuck it to the whiteboard. Everyone then gave feedback and we looked at the vocabulary.  For instance, what other words could we use instead of big?

About Two weeks later...
The children then had to think how they'd illustrate their writing.  They used thick paper which had a canvas texture and water colour pencils.

Below is their finished pdf book.  The ePub version has each child or peer reading their sentence.


Be a Bucket Filler...

Making Buckets in the class....why not make some cardboard buckets?

Last year my learners created buckets with different pattern using cardboard, black vivid and water colour pencils.


This year the children created cardboard buckets using palette paint, crayon and glitter.


To view our finished buckets click here.

Be a Bucket Filler...The Bucket Fairy Movie

Have you filled a Bucket Today?

What a great concept to introduce into a classroom environment.  I came across this book while looking for books that could be used during Circle Time and could be linked with emotional literacy. At the time I pinned most of the books I found and called them Books with a Purpose.

I've been using this concept with children over the last three years.

The first time I used this book the children decided to make a difference and teach children about what it meant to be a Bucket Filler.  Our aim was to make a documentary to show children what it meant to be a bucket dipper and a bucket filler.  They liked the idea that we carried invisible buckets on our arms.

They surveyed groups of children throughout the school and asked them what problems they were having in the playground.  The scenarios the children used in their movie were based on the common problems they found.

First they used Show Me to record and sketch their ideas.  The writing for their movie script started orally. Once the draft script was developed it was re-drafted until the script was about 5 minutes long.

We decided to use puppets for this movie because this would appeal to our younger audience. Children auditioned for lead parts; everyone had a speaking part in the movie.  The children used iPads to video themselves to develop their puppeteering skills and to work using expression in their voice.  A group of children videoed and edited the documentary.

If you want to know how the children made their puppets click here.

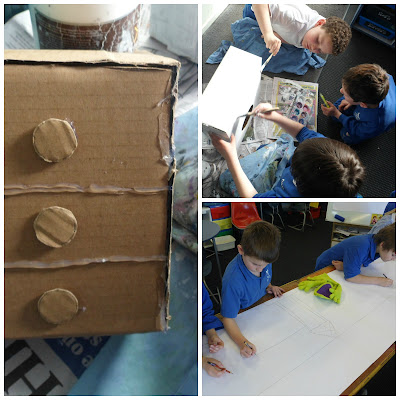
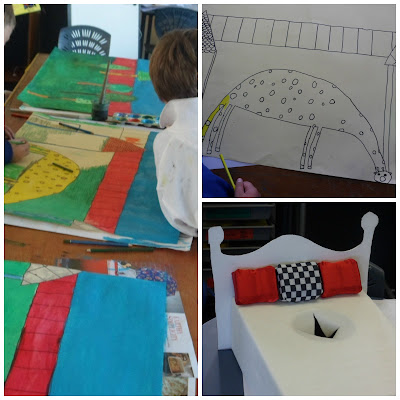
The children set their movie at a school, designed and created their props.

Making the draws and bed for the bedroom scene in the movie....
Creating the principals office and playground scene...
All working together to create the backdrops and painting the draws and bed...
The finished bed and the playground backdrop is nearly finished...
To view the movie the children created click here.


Be a Bucket Filler....The Puppets for The Bucket Fairy Movie

Have you filled a Bucket Today?

My class decided to use puppets for our movie 'The Bucket Fairy' which is inspired by the book Have you filled a Bucket today?  We thought puppets would appeal to children.  The children came up with the idea of 'The Bucket Fairy,' so she was the star of the show.

To make our sock puppets we used the glorified sock puppet pattern from Project Puppet.

Of course for a teacher to make about 30 puppets might sound daunting....at the time I just got stuck in and done it! Now I think how the heck did I do this!

It all resembled a production line.

I didn't cut out each pattern on the polar fleece before sewing.  I laminated each pattern piece and used a pen to trace this onto the polar fleece.  This saved a lot of time!  Once I'd stitched along the lines I then cut each piece out.

Making the mouth plate:
I changed this around a little bit because I didn't want to use foam.  I made my mouth plate out of felt.

I didn't use foam for the mouthplate...just stiffening.  I ironed this onto the felt.  Then on the other side I put two pieces of felt (this is the part you'd feel when you put the puppet on your arm and into the mouthpiece).


For the body I stitched up each side, but left an opening of about 5 cm near at the top of both sides. This was important because I didn't want to stuff 60 odd arms!  Before I took all the puppets to school all the heads were sewn together and the mouthplates were stitched in.  All the arms were sewn, but not attached to the bodies for each puppet.

I didn't hand stitch the mouthpiece to the head I used a zig-zag stitch on my old Bernina sewing machine.  Make sure you match the centre of the mouthplate with the centre of the mouth opening (top and bottom).


For the body I stitched up each side, but left an opening of about 5 cm near at the top of both sides. This was important because I didn't want to stuff 60 odd arms!  Before I took all the puppets to school all the heads were sewn together and the mouth plates were stitched in.  All the arms were sewn, but not attached to the bodies for each puppet.


Once I got to school the children picked their puppet colour (head, body and arms). They then had to stuff each arm.  Each puppet was put into a plastic bag.  I then took all the puppets home.  Put the arms into each body piece (where I'd left the 5 cm opening), and just sewed up the side seams.  


Once all the puppets were sewn together it was time for the children to decide what coloured eyes they would like.  The had to chose the colour of their eye cap and the round cap their eye would sit on.  When this was done I made all of the eyes.


You want to make sure each child has a named plastic bag to put all of the things they need to create their puppet.  Once they had selected their eyes I set up some table with all the different types of hair they could use for their puppet and another table with noses.

I created a swatch sheet where children could put samples of hair or write what they were going to use for their puppet.  The children walked around each table and collected their information.


When children are picking their nose it's a great idea to use bulldog clips or pins to keep the mouth shut.  This can then help children work out the position of their eyes, how their hair could be and what nose they'd like.  

I set up a table called 'Eye surgery,' this was where I helped the children glue on their eyes.  I also drew an outline of a puppet, so they placed their puppet on this when it was ready to assemble their puppet.


To see some of the props we made and why my class created a movie about being a Bucket Filler click here.


Be a Bucket Filler....The Bucket Fairy Movie

Once all the props and puppets were created it was time to film their movie and edit this.

Below are some behind the secen shots of the set.  We were able to use some screens which meant chidlren could puppeteer standing up. Some children were standing on blocks behind the screens because they were too short.


Our finished movie 'The Bucket Fairy'

Related Posts Plugin for WordPress, Blogger...